My trials and tribulations

Hi all ,this blog is going to show some of the tricks in my life ,Enjoy !

Monday, 9 July 2018

17m Yagi

17m Yagi 5 el 10m boom 
This has been on the cards for while 
Having the th5 on top means i cant come to the floor so the elements had to be slid on the boom
With the help of the mobile scaffold ..aka pallet and telehandler.

Kevlar rope for the supports 3mm
It makes the th5 look a little small.

 Only had to move the driven in 20mm for a perfect match ...well impressed with the software bang on
Pay close attention to the tubing sizes indicated ,these are metric sizes.I actually used a mixture (imperial and metric) in order to slide fit and even then the joints are tight.(www.aluminiumwarehouse.co.uk  is your friend)

Saturday, 7 October 2017

120mm Variable air capacitor

Wow it's been a while since the last post ...dont time fly!! Im wanting  a big auto ATU to handle some big doublets ,nothing on the market ...well for normal men money anyhow ! So here we go with the first thing ..the variable air capacitor. Plates are made from 1.5mm alloy 1000 series which i drew up and got laser cut ,bearings off ebay for a few pence.
 6mm brass rod holds it all together

 Plates on rotating shaft

 Fixed plates on rod ,I drilled the nuts out to 6.3mm to slip over the thread ,makes it a lot quicker and by far less tedious.

 fitted together ready to line up .Insulator is made from bakerlite .

 Adjustment is via the fixed plates jacking the plates one way or the other

 All together and meshing nicely.

Measurements are 1680pf in full mesh ,will have to mount isolated from chassis to keep the minimum capacitance down ....Should of been a butterfly .After all this i recon i could make it with twice the space ....ill get some spacers !!!

Sunday, 31 August 2014

75ft / 23m


Its up ,listen out for me #on air guys 


Up up up and away


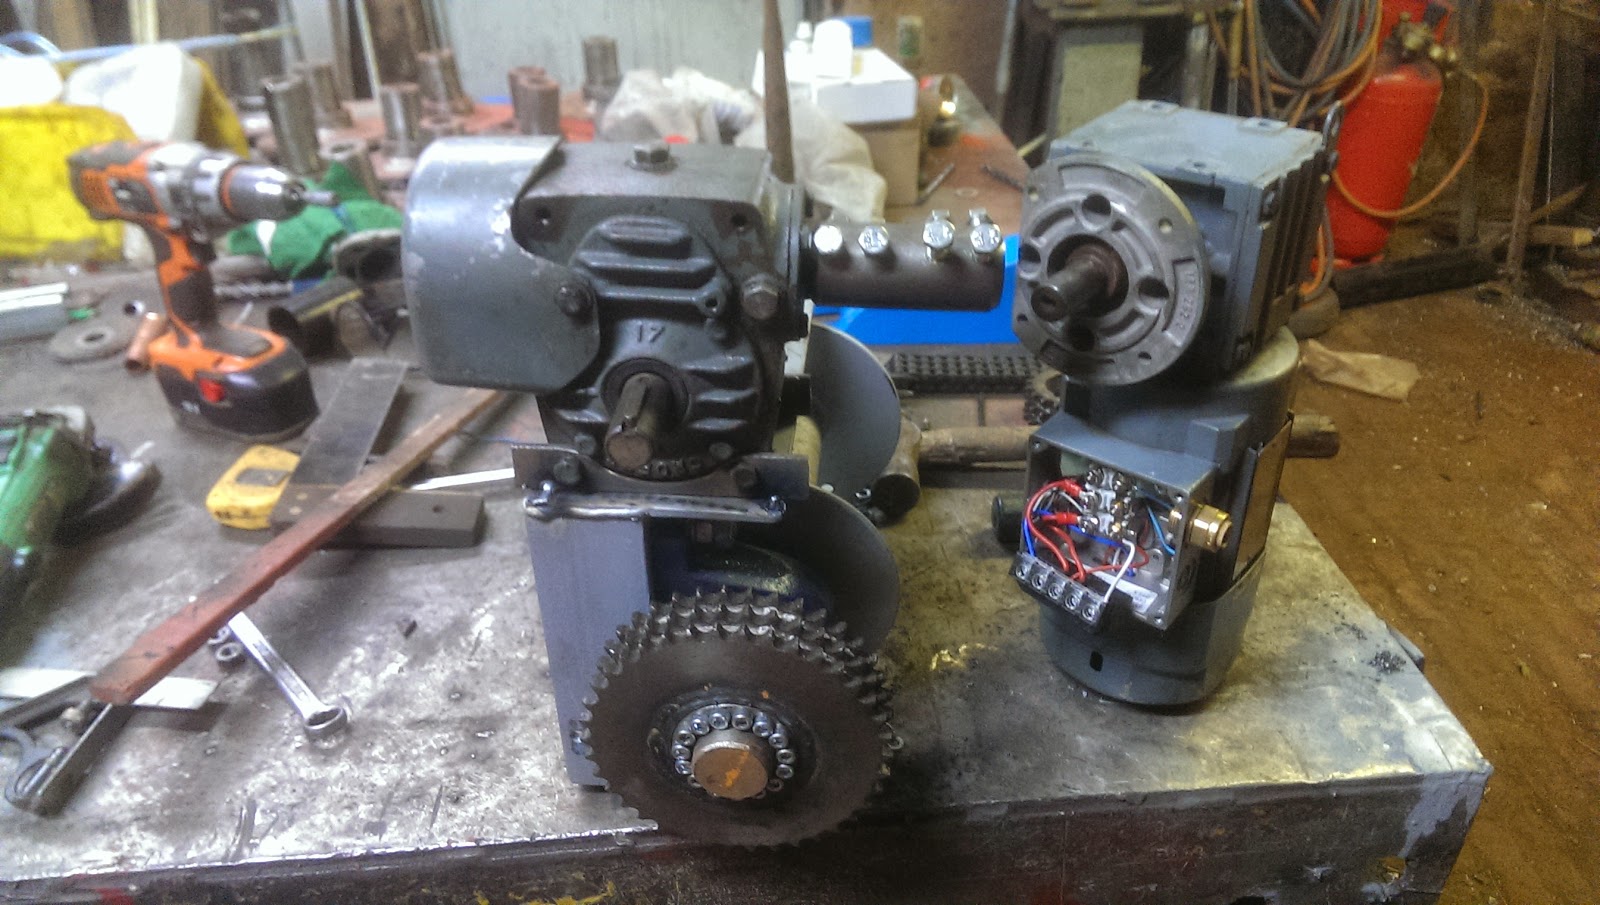
New Gear box all in place and in its mounts .Pad at the side is for the tourqe reaction arm just to allow a little movement in case the coupling isn't bang on !


Managed to maintain the old chain guard ..saved a bit of time there .


Motor fitted to final drive with anchor arm in place 


From the other side

Saturday, 30 August 2014

Its too fast

 Got round to trying the #electric tower winch ..if the motor had got enough poke it would of been up in 10 secs .It needs a reduction .Just so happens I've got the one left which I didn't use from the rotator :-).


By mounting the box here, if its still to fast i can put another chain reduction on it LOL .It will do 3 rpm as oppose 30 before .


Of course its never all straight forward over here ...the box is imperial ,they don't do metric imperial motor couplers so ive made one ...yes yes ill get some grub screws ,but for the time being they will suffice. These will also provide the drive (cant cut internal keyways here ) being as they are on the low torque side it should be fine if they break ,the worm drive will hold the tower up .


A bit more tomorrow 

Saturday, 9 August 2014

A lick of paint


All Painted ,Ringspan tightened ready to roll


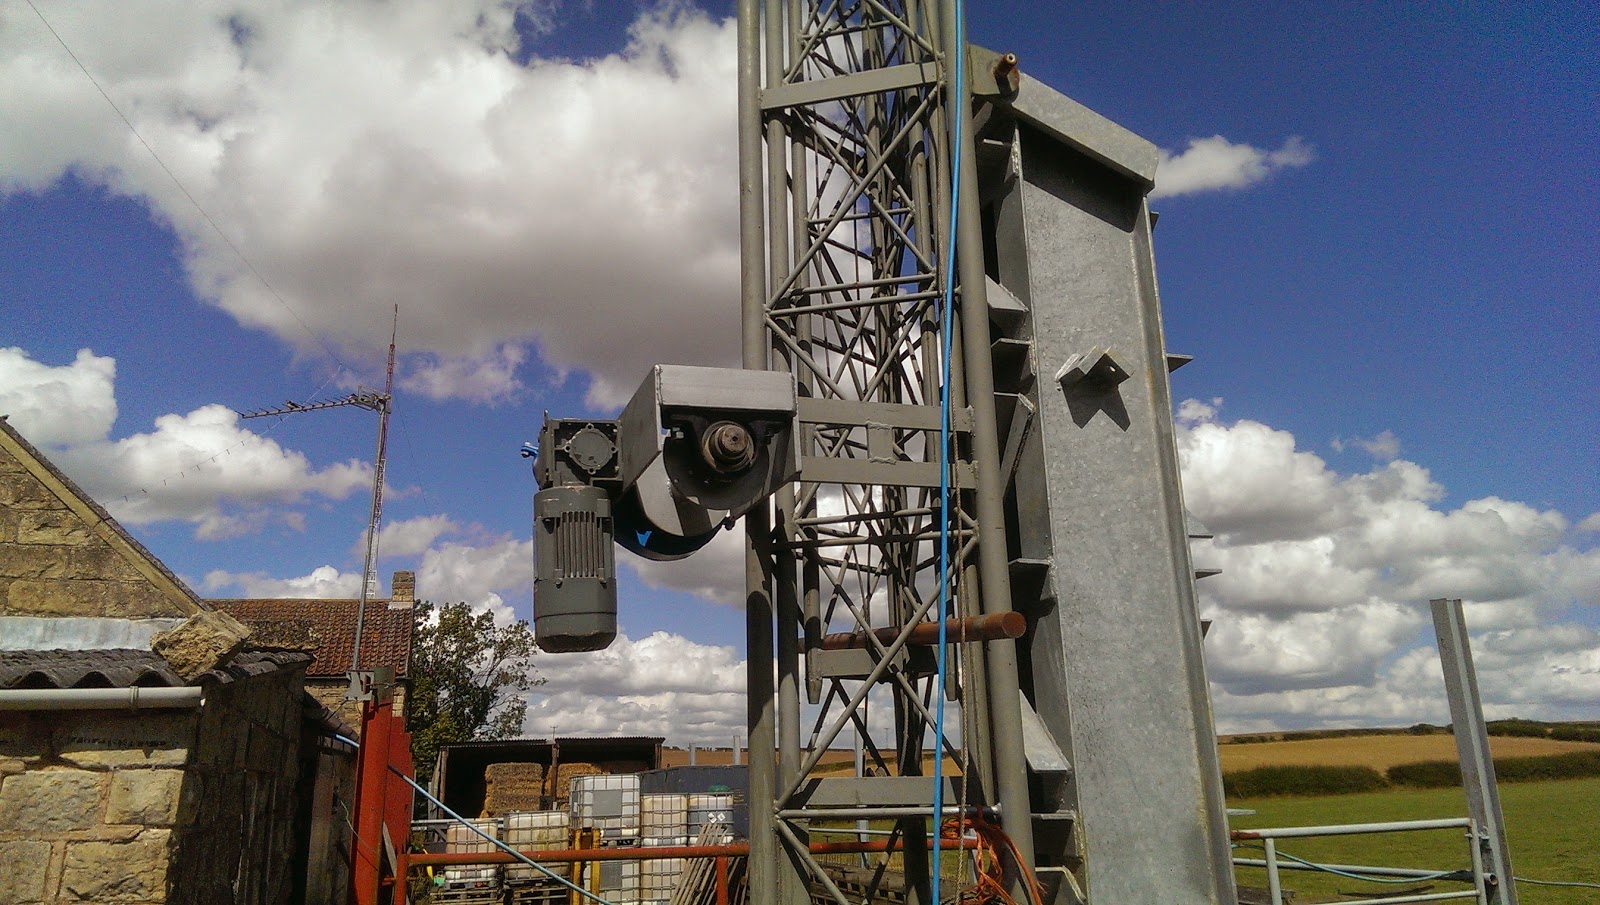
Installed onto tower, this nearly killed me !!! One hell of a lift with a bad back ,anyway its there !!!


View from the other side 


What's left to do now is get a bag of volts and chuck it in the motor ....maybe tomorrow i'm beat and need a seat .....oooh it rhymes .

Friday, 8 August 2014

Back to the winch (raise and lower)

Back to the winch .Having fitted the triplex chain ,it really needs a guard on it !!


Off cut of 3mm from the workshop steel archive !! cut and shaped 


Welded a band around the 2 half's then cut through middle ,makes a clamshell guard


This will keep the weather off the chain ,also keep the kids from getting there fingers in it ,having said that the winch is in the air abt 6ft/1.8m

A lick of paint is all i need to finish this now,unfortunately im struggling with a bad back and retired from workshop duty for a bit  

Saturday, 19 July 2014

Rotator install


A rush to beat the rain with the install ...but its up there ,however the rain beat us to the mark so still have the cable to install to the house :-(

What a thunder storm ,constant lightning ...eyes fixed on top of mast !!! 
Fitted a new stub mast too at 6m ,however im not happy with it it's 52 mm 6mm wall aluminum i recon 65mm will stop the sway a little .


Friday, 18 July 2014

Rotator for under £150


At last its all done and ready to install 


 Cable from the bottom is from the rotary encoder


Sunday, 6 July 2014

Fitting rotary encoder

Fitting of rotary encoder ,all that had to be done here is turn an adapter down to fasten and centralise the encoder

 Its in ,I need a holding bracket but ran out of time,today


Friday, 4 July 2014

Rotating tube clamp

 Boss had to be turned then welded to tube.Tightly sleeves over the landrover UJ and welded.I also drilled a hole in bottom of UJ to let the water out ,any trapped water in the winter can do some serious damage when frozen.

After Welding 


Studs welded to take up slack on  rotating pole.Inside the tube is 68mm,pipe will be 65mm ,so a little play .
 
    Bottom is drilled to put a drive dowel through the pole.Bit of cold galv and i recon the top is done .

What's left to do know is mount the rotary encoder on the base of output shaft ...and i'm good to go !!!

Saturday, 28 June 2014

Rotor controller interface

Rotor controller and pc interface ,running K3NG software and M0UPU shield for the arduino.Easy to put together just a plug in affair .Longest job was cutting the hole for the lcd display .This is just the interface for the pc the relays and 24v supply will be at base of tower ...well thats the idea for the moment !!

Rotor output shaft


Here's the output shaft for the rotator 40mm round bar turned down to 25mm then a plate welded on ,faced off then recessed for the universal joint (EX Landrover of course)


Will it fit .....oh yes


Boss to fit on top of UJ and carry antenna pole

Saturday, 7 June 2014

Rotator

Ok I got the tower up ,antenna on top ,but at the moment its fixed stateside .I need to turn it !!.cue drum roll.
.....Thats right its rotator time.Price of new ones are in the range of £1500 to £2000 with this kind of spec.Clearly im not going to pay that so here we are again in the workshop putting together a nice new one.
Motor is from a motorised invalid scooter they are on ebay Parvalux do one with reduction for around £30 ,not sure how long the price will last as it seems cheap to me !!Gearbox is a ....chinese one from the uk importer ,50:1 reduction worm drive price £79.

Output shaft on motor/gb is 12mm ,worm drive box input shaft is 14mm ..so we need a bush ,10 mins on lathe  ,you can see it in the pic .


 Motor/gb fits real snug into worm drive input shaft 


 Right upto the hilt ,picture from above motor/gb fitted ,we need adapter/torque reaction plate


Adapter plate for motor to gb 


Adapter plate fitted to motor

Motor/gb fitted to worm drive


Next is the base to tower connection ,this will also house the rotary encoder .Made with 316 stainless and 304, weld looks a little rough ....i didn't have any dissimilar rods left for the tig so a quick look in the stores and fortunately i had some 312 rods ,knocked the flux off and there ya go !!!


 Need a bottom flange to mount to the tower ..same footprint as the yaesu rotator and a shaft through the middle to fasten to the antenna pole to rotate it ...maybe tomorrow ???